The Security tab and the Privacy tab in the Internet Options dialog box will allow you to fully customize the Web sites your computer will be able to view as well as the cookie options for your browser.
Security Tab The Security tab lets you define advanced security features that your computer will employ to display content on your computer. The setting you can adjust here are more to control the flow of data between different programs on your computer that have a plug-in installed in Internet Explorer. The settings provided here are not the same as parental control; we will explore this topic later in this lesson.
For example, you can define how your computer will use an Excel spreadsheet over your office network. With full access, you will be able to use the Internet Explorer browser window to enter and execute scripts on the spreadsheet. However, if a guest to your company were to sign onto a computer with only limited rights, the security settings will prevent the visitor from accidentally running a wrong script or deleting data that could affect your entire company. Contact your system administrator or ISP if you have trouble using certain types of content on the Internet.
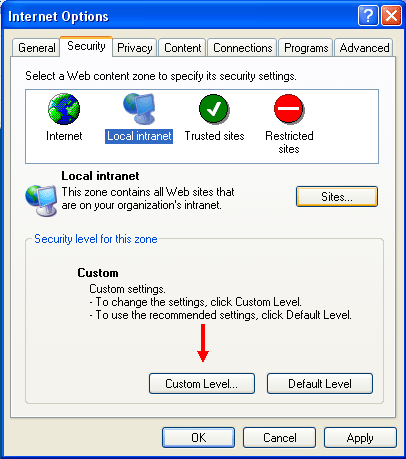
Here you can adjust individual security settings for four main groups (or “zones”) of Web sites:
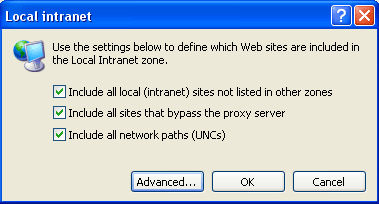
If you click the Local Intranet zone, clicking the Sites… button will bring up Local intranet dialog box:
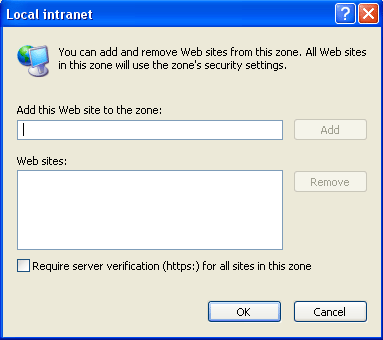
Here you can change which Web sites will be considered in the Local intranet zone. Clicking the Advanced button allows you to define which particular URLs you want to specifically define as a Local intranet zone.
Click in the “Add this Web site to the zone:” text field and type the URL you want to define in the Intranet zone. Then click the Add button to add the URL to the list of intranet sites.
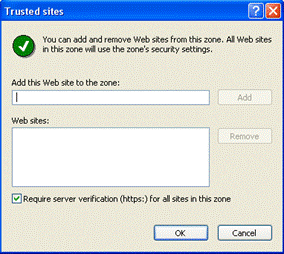
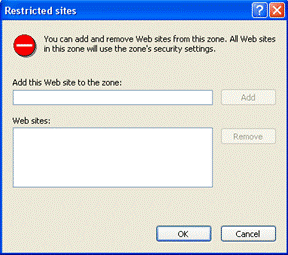
If you click either the Trusted sites or Restricted sites buttons and then click the Sites button, the corresponding dialog box will appear:
Here you can change which Web sites will be considered in the Trusted or Restricted sites zone. Click in the “Add this Web site to the zone:” text field and type the URL you want to define in the Trusted or Restricted zone. Then click the Add button to add the URL to the list of Trusted or Restricted sites.
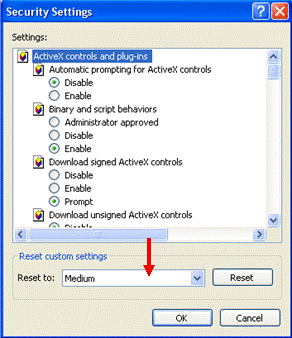
No matter which zone you choose to modify, clicking the Custom Level button will show the corresponding settings dialog box that allows you to specify particular security settings:
You also have the option to pick a specific preset level of security. Click the down arrow beside the “Reset to:” field to pick a pre-defined security level. When you have adjusted the level of security to your desired level, click OK.
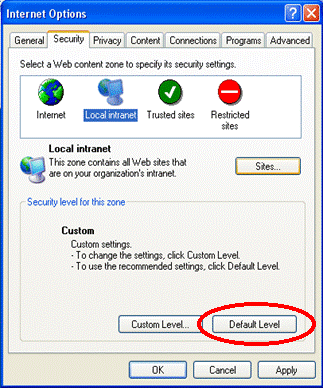
If you set your security levels too high or if you cannot view certain Web sites that you could before, you can reset each zone back to default by clicking the “Default Level” button:
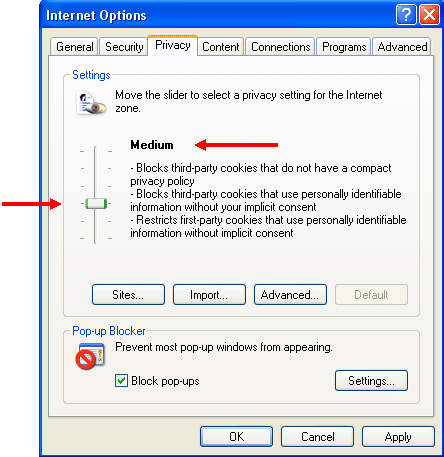
Privacy Tab The Privacy tab allows you to customize what Web sites or groups of Web pages will be able to store cookies on your computer. You can also enable or disable the Pop-up blocking functionality of Internet Explorer.
Move the slider up or down to see the different cookie security levels are available. The details of each level are described beside the slider:
The Privacy tab also features four buttons that give you the ability to change advanced cookie settings:
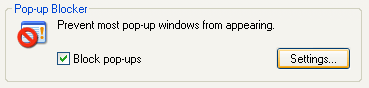
The automatic Pop-up blocker can be enabled or disabled by selecting the check box at the bottom of the Privacy tab. Clicking the Settings button will display the Pop-up Blocker Settings dialog box:
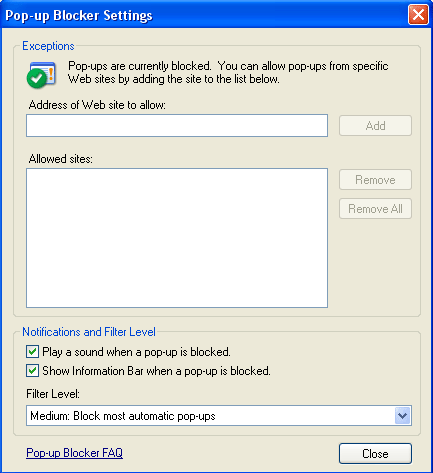
Here you can set a specific URL to always display or always block pop-up windows on your computer. Enter the URL in the “Address of Web site to allow:” text field and click the Add button. The URL will appear in the list below the text field.
You can also specify how Internet Explorer will react to pop-up windows by playing a sound or showing that a pop-up window has been blocked in the Information Bar. Finally, you can set the filter level by clicking the down arrow under the Filter Level: heading to change the setting from the default Medium setting.
|